
A previous post has already introduced the subject of a most useful work that was published in the 1930s – Parsons’ Decorative Finishes. Subsequently I have used it as a ‘prompt’ for posts dealing with Imitation Stone Paints, Permanent Greens; Gloss Enamel Finishes and several other types of paint.
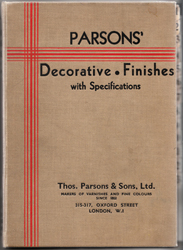
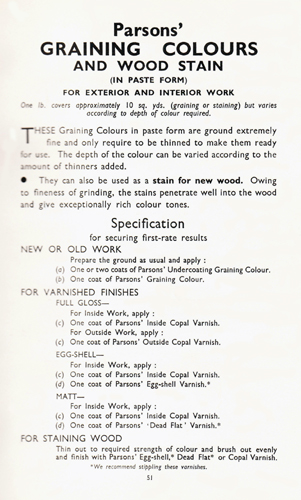
The book is divided into 17 sections and one of these refers to the tinted Scumble Glaze and the Graining Colours offered by Thomas Parsons’ at the time.
Scumble Glaze
Their Scumble Glaze has been discussed in an earlier post.
Essentially, scumble glaze is a semi-transparent medium which is applied over a hard dry ground usually of a different colour in an eggshell or flat enamel. While the scumble is wet it is manipulated in such a way as to expose portions of the ground colour. The essential features of a scumble are that it should remain open long enough to be manipulated but should retain the markings made in it without flowing out. It is normally tinted, but in some ‘broken colour’ techniques (such as ‘Shading’) it is applied untinted.
The woods most usually attempted by decorators were oak, mahogany and walnut, each of which has several varieties. However there are numerous other decorative woods and Thomas Parsons’ produced a range of tinted undercoats, which when overcoated with the relevant tinted scumble glaze and figured would produce a tolerable imitation of various woods.
The techniques and tools used to produce the appropriate grain varied, but the principal ones were as follows:
Oak
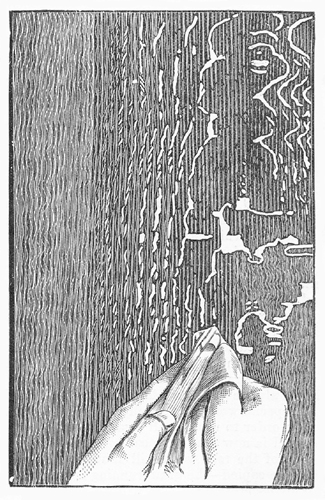
The scumble should be laid off regularly over the ground colour to a depth of colour representing the average appearance of the wood that is being imitated. It is always laid off in the direction of the grain, and should be in keeping with the construction of the object being grained. The surface is now ‘flogged’ with a thin straight-haired brush known as a flogger and combed with steel graining combs, varied sometimes by the use of leather or rubber combs. The prominent light markings (known as the figure) are then put in, either with a graining horn / thumb piece or with the thumb nail; the horn or nail is covered with one or two thicknesses of soft rag to allow it to wipe out the marks cleanly without leaving hard edges (see above).

The spaces between these marks are then mottled to show the undulations of the grain and the shadows that lie side by side with the light markings; any little touches or softening necessary to complete the likeness to the wood are also put in. Once allowed to dry, the work can then be overgrained before a coat or two of varnish is applied.

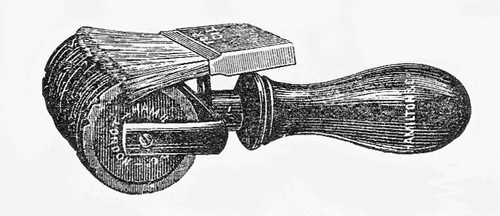
The markings of the grain are sometimes added by means of a check roller, which is used to suggest the dark-coloured pores in oak. It consists of a number of serrated metal discs mounted on a wooden handle. One type of check roller is sold with a clip-on attachment of a mottler, which moistens the discs as they rotate (see below).
Mahogany
Mahogany is usually built up in many stages. The ground colour is laid on and manipulated into form using a mottler. Before this has set up a flogger is then employed to produce the pore marks. It is then allowed to dry and afterwards overgrained with a thin overgrainer to produce the main figure and carefully worked with a mottler to produce the final faint mottling. All the work is softened with a badger softener.
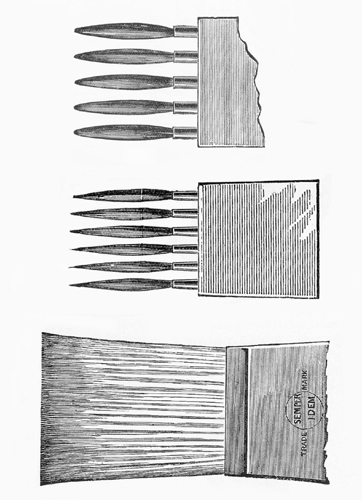
Overgrainers were made in several varieties – such as the castellated, the knotted, and the flat hog-hair – some tradesmen preferring one kind, and some another. For the fine wavy hair-line seen in bird’s-eye maple, a sable overgrainer was employed. This overgrainer gave a number of fine lines at one stroke, and by holding the brush at different angles the distance between the lines could be varied.
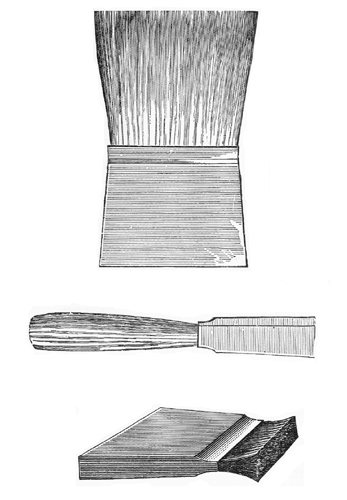
Mottlers were comparatively thick by comparison. Again, there were a number of different types – below can be seen the more common hog-hair variety as well as the camel-hair mottler. (This was actually made from the hair of squirrels’ tails).
Walnut
The ground colour for walnut graining is usually laid on fairly sparsely and then the lighter parts are wiped out with a cloth and mottled in a rough representation of the light and dark parts of the wood. This is allowed to dry and then the main markings and knots are put in with an overgrainer and softened with a badger softener. Fine veins are put in with a pencil (thin brush) and blended together. Once again, this is allowed to dry and is overgrained before mottling.
Walnut and other rare or valuable woods lose their impact if used promiscuously and in a manner inconsistent with the use of such woods in construction.

Note the variety of combs and the check graining roller at top R/H
Brush Graining
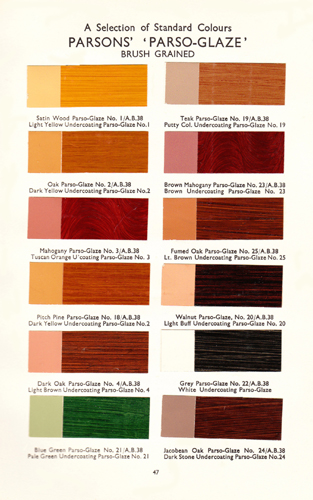
Often slightingly referred to as “Pub Graining”, this is the simplest form of suggesting wood and is obtained by drawing a dry brush through newly-applied (tinted) scumble glaze (as above).
Note
Graining was frequently carried out with watercolours, often using stale beer or gum arabic as a medium. However, in this post I have tried to limit the techniques to the products sold by Thomas Parsons’.
Some information on the early history of graining can be found HERE.
View Larger Map


Hello Patrick
yesterday whilst researching neoclassical paint colours I happened onto your website and found absolutely what I was looking for !!
I also have a passion for colour – and of course – the perfect match
so finding your site and enjoying spending quite some time on it, was a delight …
Many thanks and kind regards
Sue Houlihan
How kind, Sue. I am trying to add to it all the time. There’s so much to talk about in the field of colour. Patrick
Thanks for posting this very interesting article on graining. I have tried very simple brush graining techniques in my own home using an oil based scumble. Unfortunately, in areas which get full sun the scumbling has faded badly. Is there any graining stain/scumble that would not fade in direct sunlight?
Thank you.
Sun / UV light does have a very powerful effect on paint and colour. However, the yellow and red iron oxides tend to be more lightfast than, say, the siennas. It could be that if you were to tint the scumble with the oxides, instead of using stainers or ready-mixed scumble you will get a longer life out of it. The windows of Hyde Park Lodge were grained in imitation of oak twenty years ago and have only recently become significantly bleached and weathered.